IDM PowerTips
Column Markers
Whether you are composing simple text, or programming complex nested logic, the column markers serve as an indentation guide to make it easier to read your file and to ensure that your formatting is correct. You can use just one column marker or multiple markers.
Column Markers
The benefit of a column marker is that it can help you to format your text/code, or in some cases to make it easier to read complex nested logic.
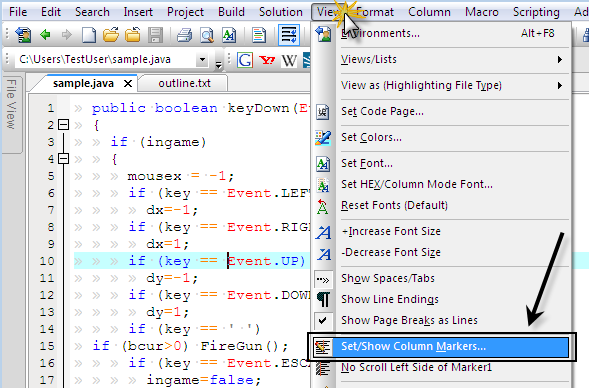
You can enable the column markers in the Set/Show Column Markers dialog in the View menu.
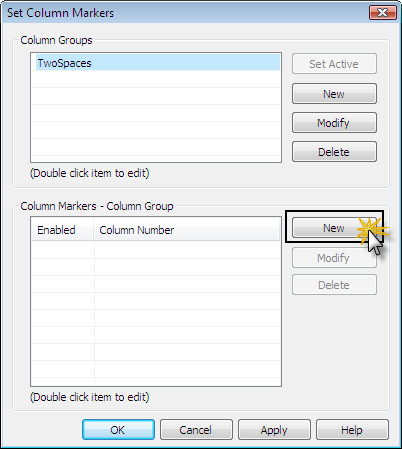
The Set Column Markers dialog allows you to create multiple sets (or groups) of column markers which may be used for any number of purposes. For the purpose of this power tip, we will create 2 column marker groups. The first group is intended for a document with a tab width of two spaces (column markers at columns 2, 4, and 6). The second group for a tab width of four spaces (column markers at columns 4, 8, and 12).
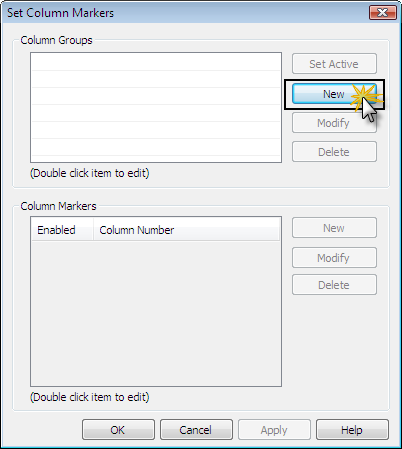
Step 1. First, we will create the group. Click on the New button in the Column Groups section (top) to create the first group – we will call this group “TwoSpaces”.
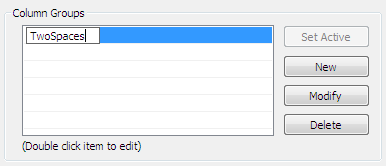
After clicking on the New button, simply type the name “TwoSpaces”. Hit the ENTER key to accept the changes.
Step 2. Now we will create the individual column markers. Click on the New button in the Column Markers section (bottom).
In the column number field type “2”. Hit the ENTER key to accept the changes.
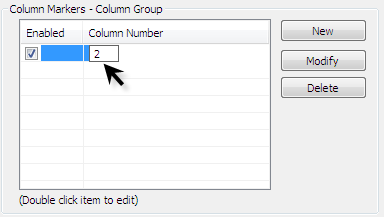
Note: If you wish to enable/disable the individual column markers, you can do so by checking/unchecking the checkbox in the Enabled column.
Note: You may also use the Modify/Delete buttons to modify and delete (respectively) the individual Column Markers.
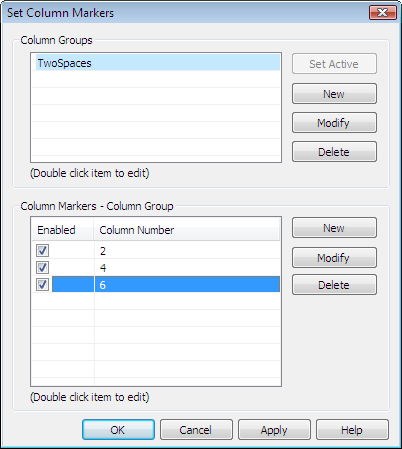
You can enter as many column markers as you wish. For the purposes of this power tip, we will create two more Column Markers – at columns 4 and 6. Our “TwoSpaces” Column Group looks like the following when completed:
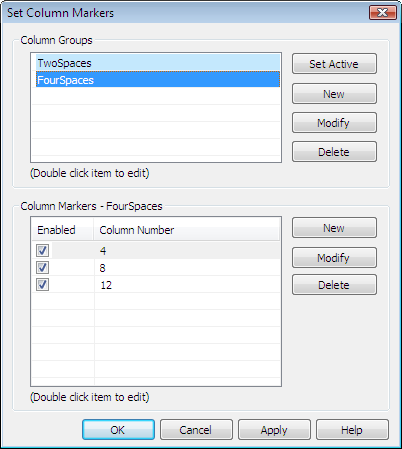
To create our second column group – called “FourSpaces” – we will repeat steps 1 and 2. The result is as follows:
Step 3. Finally, we need to activate the column markers. To do this, select the desired Column Group and click on the Set Active button. Note: the light blue background for the TwoSpaces group indicates that it is the active group
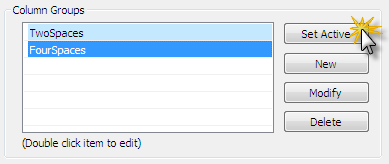
Click OK to accept your changes and to return to the edit window.
As you can see in the screenshot below, our TwoSpaces group is active, and a thin line is drawn vertically in columns 2, 4, and 6.
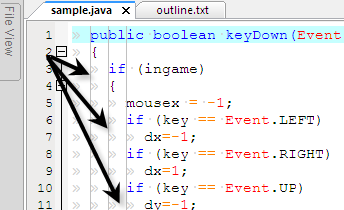
No problem, we can quickly activate the FourSpaces group to help us in this case. To do this, return to the Set Column Markers dialog in the View menu. Select the FourSpaces group and click on the Set Active Button, then click OK.
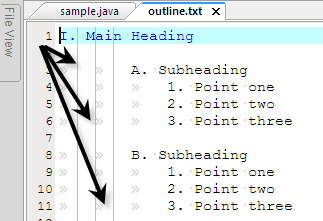
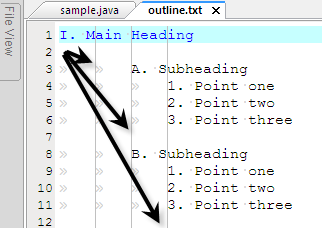
As you can see in the screenshot below, our FourSpaces group is active, and a thin line is drawn vertically in columns 4, 8, and 12.
Setting the Color for the Column Markers
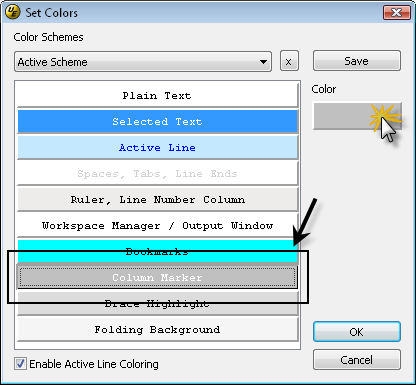
You can customize the display color for the column markers in the Set Colors dialog in the View menu.
To change the color, select the “Column Marker” entry, then click on the color button.
