IDM PowerTips
Customizing Toolbars
A principle cornerstone of UltraEdit is its highly configurable user interface. Designed with your preferences in mind, UltraEdit allows you to configure your menus and toolbars exactly as you would like to see them. Beyond this, you may also add your own tools to the toolbar, create your own toolbars, or create custom icons for your toolbar!
In the below tutorial, we will show you how to easily and quickly configure your main and custom toolbars.
1. Customize the main toolbar
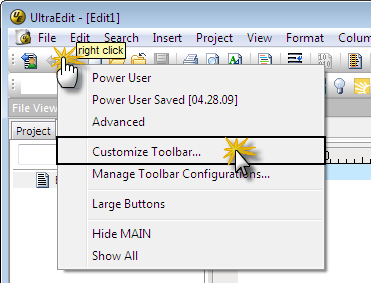
To customize the main toolbar, simply right-click on the toolbar itself. Select the “Customize Toolbar…” option.
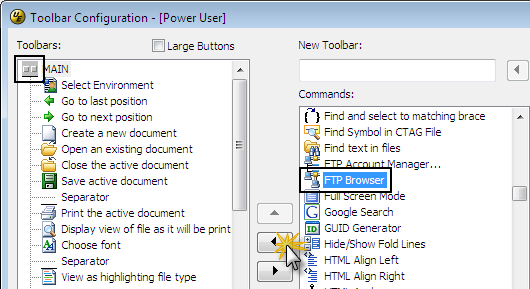
The following dialog contains two frames: the toolbars (on the left) and the available commands (on the right). The toolbars frame is an actual mapping of your current toolbar items. By default, the main toolbar is expanded and all main toolbar items are shown; however you can collapse this and see other available toolbars by clicking the gray box next to the heading “Main ToolBar”.
To add an item to your main toolbar, scroll through the list of commands on the right. For our example, we’d like to add the FTP browser icon to our toolbar. Normally the FTP browser can only be accessed under File -> FTP/Telnet -> Browse. By adding this item to our main toolbar, we can access the browser with one click.
Scroll down the list of commands, which are sorted in alphabetical order. Find the entry for the “FTP/SFTP Browser”, select it, then click the LEFT arrow button to add it to your main toolbar.
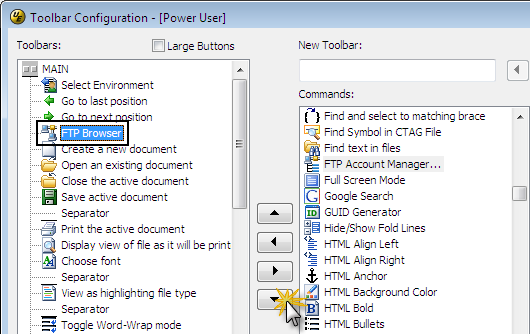
To change the position of your newly-added item on the toolbar, make sure it is selected, then press the UP and DOWN arrows in the middle of the dialog to move it to the appropriate position (as shown in the below screenshot).
Once you have moved your new toolbar item to the position you’d like, press OK to close this dialog. UltraEdit will update its main toolbar and you will see your new toolbar item exactly where you positioned it.

2. Creating a new custom toolbar
Sometimes it is necessary to create an entirely new toolbar for new toolbar items. This is very easy to do and follows many of the same steps used to add a new toolbar item.
We would like to add a new toolbar for all three FTP commands (Browse, Open from FTP, Save As to FTP). In order to do this, we will once again access the toolbar customization dialog by right-clicking on our toolbar and selecting “Customize Toolbar…”
At the top right of this dialog, you will see a text field labeled “New ToolBar:”. Type in the name of your new toolbar here and press the arrow button to add it to your list of toolbars in the left frame. We will call our toolbar “FTP”.
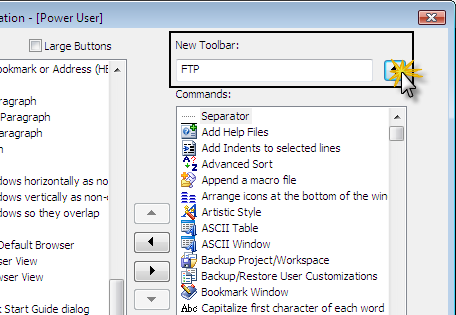
In order to view our new FTP toolbar only, we can collapse the main toolbar by clicking the gray icon next to its heading, as shown in the below screenshot.
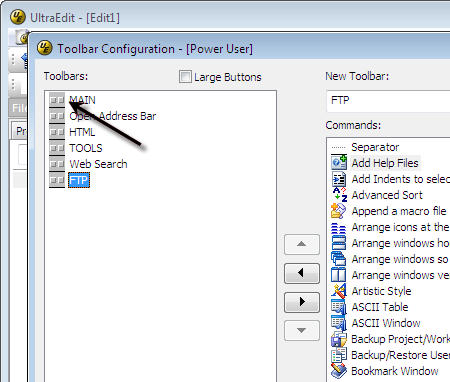
Next, select the new toolbar. Look in the right frame for the specific commands you’d like to add to your new toolbar. We will add the “FTP/SFTP Browser”, “Open from FTP”, and “Save As to FTP items”. Select them one-by-one and click the LEFT arrow button in the middle of the dialog.
The below screenshot shows what our new FTP toolbar looks like after we have done this.
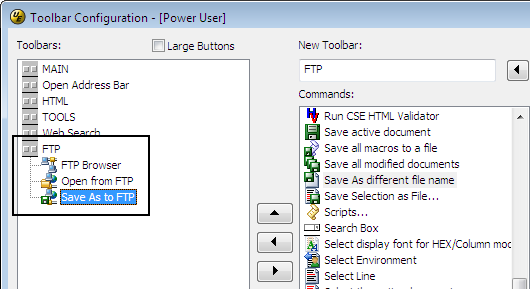
Click OK, and you will see your new toolbar, complete with all commands you added, above the editor window.
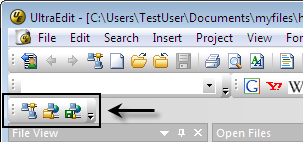
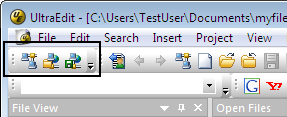
In order to move the position of the toolbar, “grab” the vertical line at the beginning of the toolbar and drag it to the desired position. In our example, we have positioned the FTP toolbar right before the main toolbar.
3. Replacing a toolbar icon with a custom icon
You can also change the look of your toolbar icons. In order to do this, you will need to have a premade 16 pixel by 16 pixel Windows bitmap image you’d like to use to replace an existing toolbar icon.
In order to do this, access the toolbar customization dialog by right-clicking on your toolbar and selecting “Customize Toolbar…”
For our example, we would like to replace the FTP browse toolbar icon with one of our own. We will select and expand the FTP toolbar from the toolbars frame, then select the FTP/SFTP Browser toolbar item.
At the bottom of this frame is a text field labeled “Ext. Bmp:”. This is where you may define an external bitmap image for your toolbar item. Click the ellipsis (“…”) button to define the location of your bitmap.
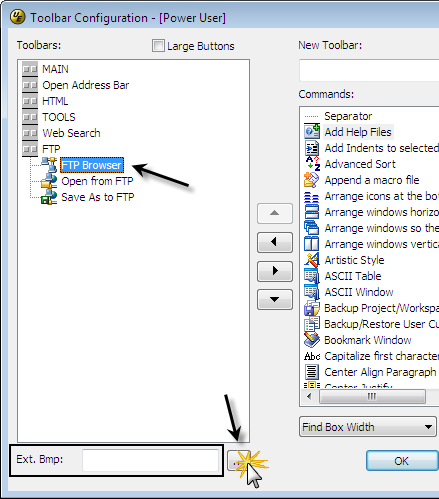
Navigate to your bitmap, select it, press OK, then press OK again to save the change and add the new icon to the toolbar as well as escape the toolbar customization dialog. Our new FTP browse icon is shown in the screenshot below.

That’s all there is to it! You can customize your toolbars to the fullest extent to fit your editing needs and match your style.

