IDM PowerTips
Encrypt and Decrypt Text Files
Need to Protect Your Sensitive Data? UltraEdit’s built-in encryption provides a quick and easy way to encrypt/decrypt your sensitive data – allowing you to keep your sensitive data secure. As of v14.00, you can encrypt and decrypt your files using a built-in advanced encryption method.
How to Encrypt and Decrypt Text File
Step 1: Encrypt File
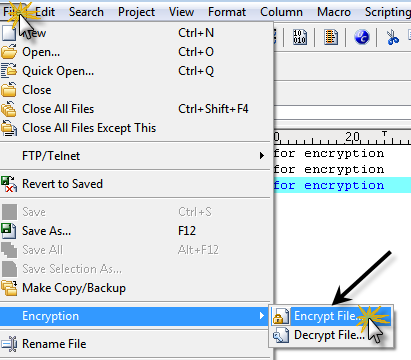
First you will need to browse to and open the desired file using the File : Open dialog. With the desired file as the active file in the editor go to the File Menu and select Encryption : Encrypt File
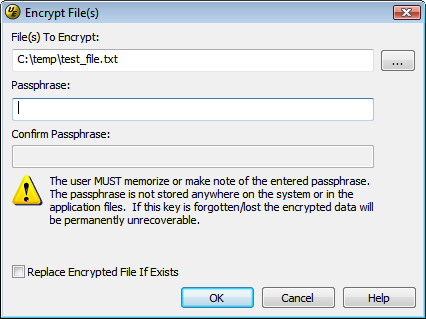
You will then be presented with the Encrypt File(s) dialog. You will see that the name/path of the active file is populated in the “File(s) to Encrypt” field.
Multiple Files
You can manually type additional files for encryption by separating the name/path of the additional files with a semi-colon. You can also select multiple files by clicking on the Browse button (next to the File(s) to Encrypt field). Simply click on the browse button and select multiple files using the CTRL key or SHIFT key and mouse. With the files selected, click on the Open button, and the file names/paths will be passed back to the Encrypt File(s) dialog.
For the purposes of this power tip, we will only encrypt a single file – test_file.txt.
Passphrase
With the Encrypted files specified in the Files to Encrypt field, type the Passphrase in both the Passphrase field and the Confirm Passphrase field.
Note: You MUST memorize or make note of the typed encryption passphrase. The passphrase is not stored anywhere on the system or in the application files. If this passphrase is forgotten/lost the encrypted data will be permanently unrecoverable.
Replace Encrypted File If Exists
When the file is encrypted, UltraEdit will create a new (separate) file with a .UENC extension. If the “Replace Encrypted File If Exists” is enabled, UltraEdit will replace the existing .UENC file with the new .UENC file.
Click OK to Encrypt the file.
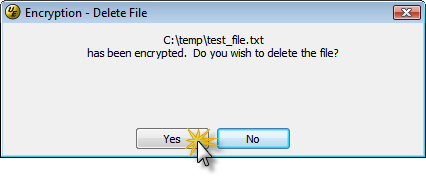
You will be prompted to delete the original file when UltraEdit has finished encrypting the file. Select Yes or No based on your desired option.
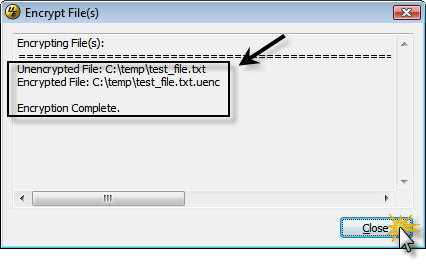
The file has been encrypted, You should now see the Encrypt File(s) output:
If you browse, via Windows Explorer, to the location of the encrypted file you will see a file with the .UENC extension.
Step 2: Decrypt File
If you try to open the .UENC file with the File : Open dialog, UltraEdit will prompt as to whether or not you wish to decrypt the file. If you click “YES”, UltraEdit will open the “Decrypt File(s)” dialog with the file name pre-populated in the File(s) to Decrypt field.
You can also navigate to the Decrypt File(s) dialog by going to File : Encryption : Decrypt File. You may type the file to decrypt or browse to the file by clicking on the browse button to the right of the “File(s) to Decrypt” field.
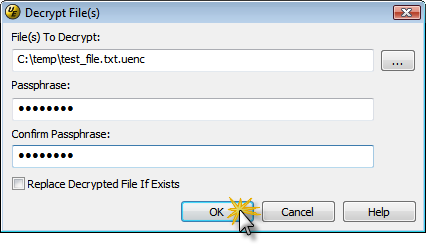
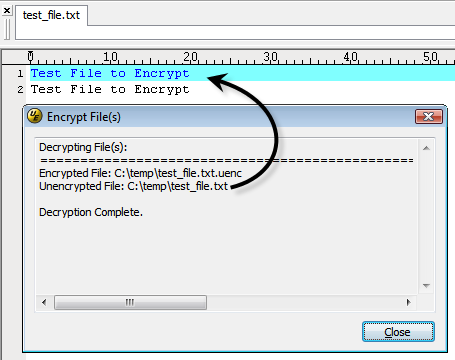
After selecting the file, type the Passphrase in both the Passphrase field and the Confirm Passphrase field. If the passphrase is correct, UltraEdit will unencrypt and open the file in the editor.
