IDM PowerTips
Create CSS style sheets with UltraEdit’s built-in CSS style builder
UltraEdit and UEStudio include a very handy CSS style builder which can help you build your cascading style sheets quickly and easily. Below, we’ll look at using the style builder and its different options.
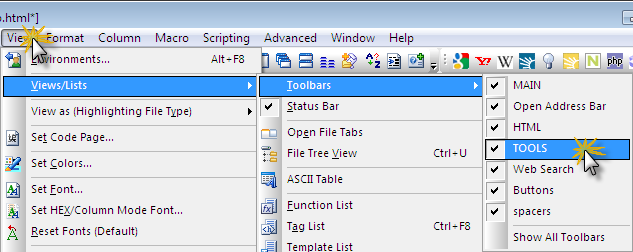
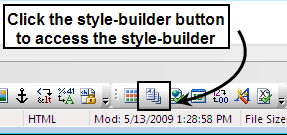
To invoke the CSS style builder, click the “Style Builder” button on the TOOLS toolbar (if you can’t see this toolbar, go to View -> Views/Lists -> Toolbars and select it.
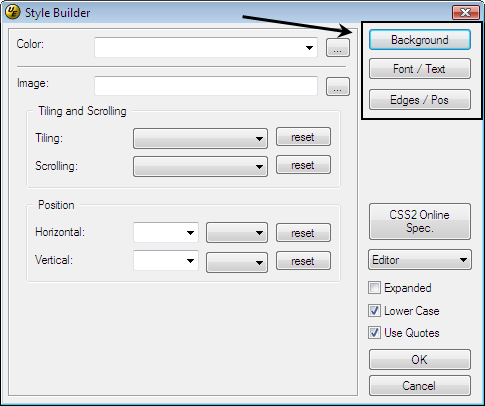
The CSS style builder is divided into three parts based on properties; background styles, font/text styles, and edge/positioning styles. To access these, click the buttons in the upper right area of the style builder as shown in the screenshot below.
Below, we will look at all of the available CSS styles amd values in the CSS style builder. However, if at any time you want to add your selected styles into the active file, you can do so by making sure “Editor” is selected in the dropdown on the lower left. Alternatively, you can select “Clipboard” to send your CSS style selections to the clipboard instead of the active file. Also, many fields include a “Reset” button to clear out values that have been already been input.
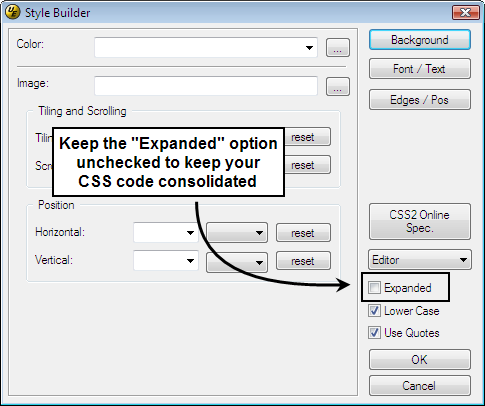
The CSS style builder will attempt to consolidate your styles to as little code as possible, keeping your stylesheet smaller in size. Checking the “Expanded” option will prevent this and assign each value to its own property, instead of consolidating multiple properties to one value. For instance, with this option checked, the following code:
Checking the “Lower Case” option will ensure that all values/properties inserted into your document are lower case.
Checking the “Use Quotes” option will enclose your inserted values in double-quotes, which are required when inserting inline styles via an HTML “style” attribute inside of a tag.
Background styles
To add a background style to your cascading style sheet, click the “Background” button at the top right.
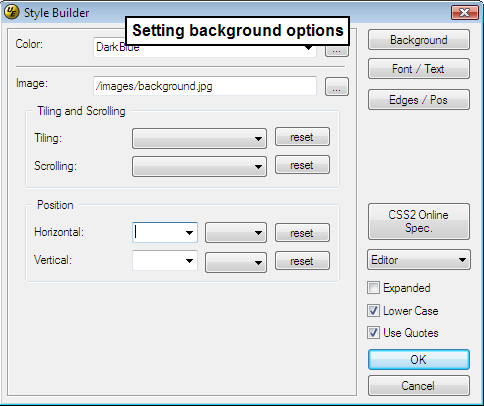
The top color option allows you to select a background color for your style; several CSS-supported colors are listed by name in the dropdown box. You can also click the “…” button to invoke a Windows color picker to choose a custom color; the hexadecimal equivalent will be inserted.
The image field allows you to type or browse to the path of an image that you would like to use in this style. Tiling allows you to set the background image to tile vertically or horizontally or disable it completely, Scrolling will allow you to enable or disable the scrolling of the background image when a user scrolls the page in the browser; if you disable scrolling, the background image will be fixed and will not move regardless of where the user scrolls the rendered HTML document.
Finally, the position options allow you to set vertical and horizontal offsets for your background image. The dropdowns allow you to select the units of measurement for this offset (percentage, pixels, ems, etc.).
Font/text styles
To access the font/text styles, click the “Font / Text” button. You’ll see several options for styling fonts here.

The system font option allows you to set a font for your style based on the system’s (brower’s) font settings for captions, icons, menus, etc. The font family option and the next several options under it allow you to set the font styling for your style, including the color, bold/italic, size, etc.
Beneath the font styling options are the formatting options for text, including indentation, alignment, decoration, and capitalization.
Styling edge / positioning
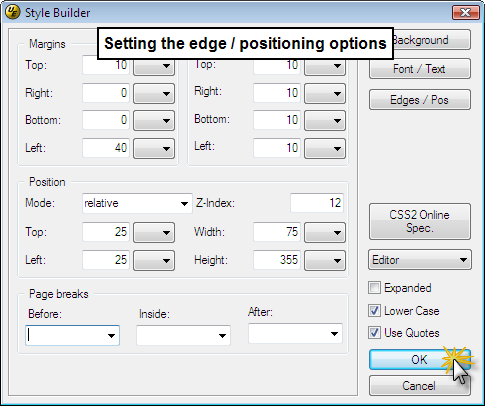
You can see the edge and positioning styles (including margins and padding) by clicking the “Edges / Pos” button in the style builder. You can set both the margin and padding of your style by entering values into these text fields and selecting the appropriate unit of measurement. Usually, either pixels, ems, or percentage is used as the unit of measurement with cascading style sheets.
Note: to undertand how CSS margin and padding work together, and how they may be used on different HTML elements, you may want to visit the following link which describes the CSS box model:
http://www.w3.org/TR/REC-CSS2/box.html
The “Position” options near the middle of the dialog allow you to configure how your style is positioned (if at all). Usually the positioning mode is set to either relative or absolute. Remember, relative-positioned elements will be offset (based on the position values you provide) from where they would have been normally positioned in the flow of the document, while absolute-positioned elements will be offset (based on the position values you provide) from the element’s containing element. Positioning can be set as an offset from the top and left.
The z-index property allows you to specify how an element is “layered” on a page; in other words, if two elements positioned by CSS overlap, the element styled with the greater z-index will be positioned on top of the other.
You can also set the width and height of your CSS style under the “Position” options. Width and height can only be used on block-level elements, and not inline elements like <span>.
Finally, you can set page breaks for your style at the bottom of this dialog. These are used for printing and won’t affect the browser display of the document. More information on setting page breaks for printing with CSS is available here:

