IDM PowerTips
Setting File Associations in UltraEdit/UEStudio
A file association is used by Windows Explorer to determine which application will open the file when it is double-clicked (or opened) in Explorer. In the interest of speed, many UltraEdit/UEStudio users want to associate specific file types with UltraEdit/UEStudio so as to allow them a fast and easy way to open files from within Windows Explorer. UltraEdit/UEStudio allow you to interact with the Windows File Associations with an easy-to-use configuration dialog.
To clarify, UltraEdit/UEStudio do not “control” the file associations, the operating system is responsible for maintaining the associations; however, UltraEdit/UEStudio provides an interface to configure the file associations in Windows. The following power tip will guide you through configuring file associations – for the purpose of associating the files with UltraEdit/UEStudio – in Windows.
File Associations
The File Associations configuration dialog gives you the ability to configure (add/remove) file associations for the operating system. You can access the File Associations control in Advanced : Configuration : File Associations.
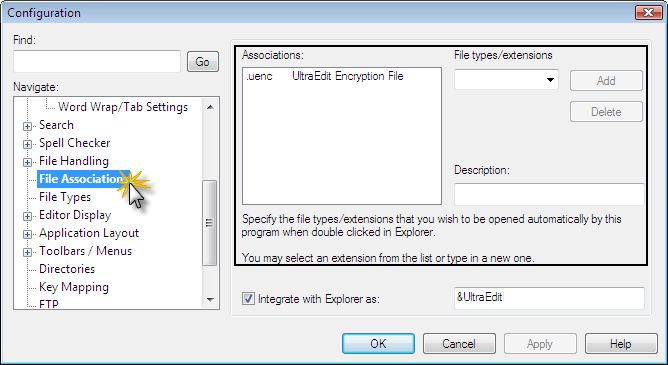
Add an Association
There are two methods of adding an association 1) select the item from the dropdown list, or 2) type in a new extension.
Option 1: Select Extension from the dropdown
There are multiple pre-defined extensions available in the the File types/extensions list. To add one of the extensions defined here, simply click on the extension from the list.
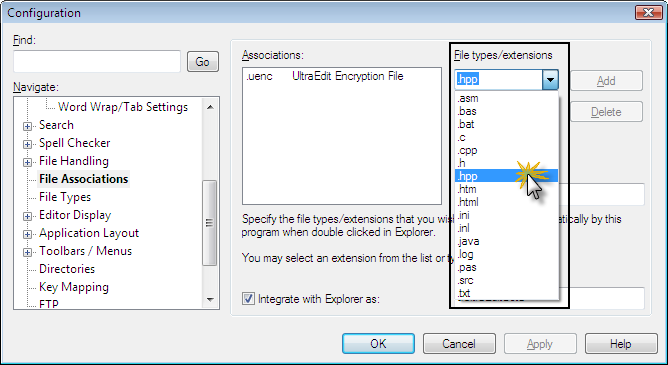
Option 2: Type the Extension manually:
Obviously, if you do not select the extension from the dropdown list, you would need to type the file extension and description manually. When you type the extension, be sure to prepend the extension with a period, ie:
correct: .txt
incorrect: txt
Set the Association
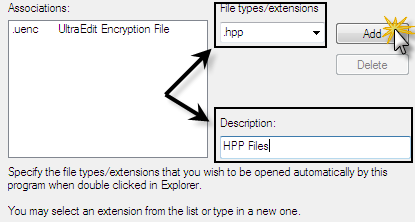
Now that we’ve selected/typed the extension, we can move on to setting the association. UltraEdit/UEStudio require an entry for BOTH the file type/extension and the description. When both fields are populated, the Add button will be activated.
Click “Add” to assign the file type to UltraEdit/UEStudio.
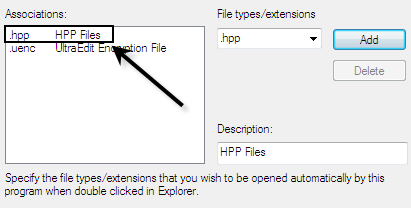
After you click on the “Add” button, you should see that your association is visible in the Associations window.
To test whether the association has been set, close UltraEdit/UEStudio, navigate (in Explorer) to a file of that type, then double-click the file. You will see that the file is opened in UltraEdit/UEStudio.
Remove an Association
When UltraEdit/UEStudio adds the association, it saves the old association (if it was previously set) and restores it if the association is later removed using this dialog.
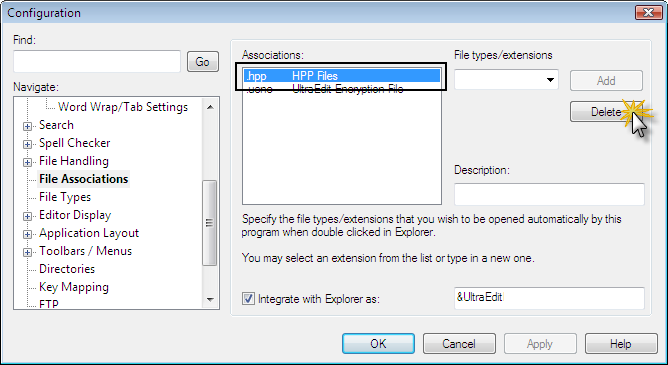
To remove the association, simply select the association from the Associations window and select Delete
Troubleshooting
Some users may experience trouble setting/maintaining file associations from within the File Association Dialog. The most common issue, as it relates to File Associations, it that the user’s Windows Account does not have sufficient privileges to maintain the associations. In order to maintain file associations, the Windows account would need write access to the entries in following registry key:
HKEY_CLASSES_ROOT

