IDM PowerTips
Adding a file to the VCS (version control system)
A trademark feature of UEStudio is it’s powerful Version Control System. As you continue in your development, it is likely you will need to add files to the version control repository. UEStudio makes it fast and easy to add files using its version control interface.
Adding a File to the Version Control System (VCS)
Note: This Power Tip assumes that you have already configured a version control account/system. If you do not yet have a version control account/system configured, please click here to view our “Configuring VCS with UEStudio” Power Tip.
For those of you who have not heard of “Version Control”; Version control systems keep track of multiple versions of a source file. Version Control provides a great deal of power/flexibility to your backup strategy and is much more powerful than standard backups
Step 1: Open the project
From the Project menu, open the project that includes the module you would like to add the file(s) to.
To add a file to the repository, you must have first checked-out the module. If the module is not already checked out, you may check it out from the Project->Version Control System menu. Click on the “checkout” menu item.
If you do not know how to check out the module, or your project has not been configured to use your version control system, please click here to view the “Configuring VCS with UEStudio” Power Tip.
Step 2: Open/Create your file
You will need to open or create the file that will be added to the version control system.
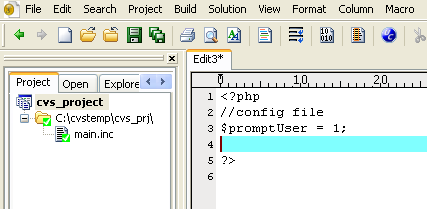
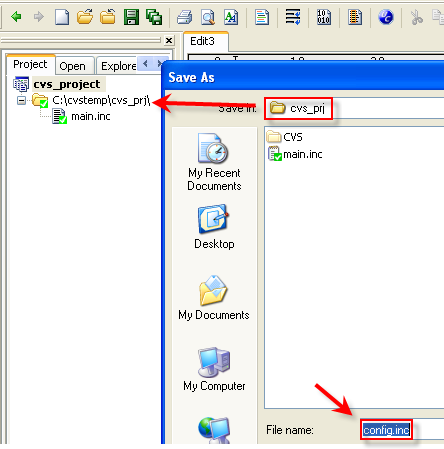
Step 3: Save file to local root path
After you have opened/created the file you wish to add you will need to save it to the local root path. The local root path is the directory that you checked-out the module to.
In our example below, we checked out the module to “c:\cvstemp\cvs_proj\”, so we will save the file “config.inc” to “c:\cvstemp\cvs_proj\”.
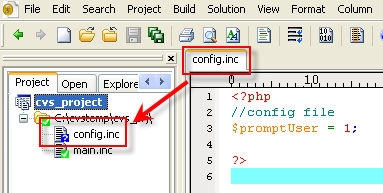
After saving the file to the local root path, you should see the file icon with the blue question mark icon on it.
Note: You may need to refresh the project view to see the new file in the module. You can do this by opening/closing the folder by clicking on the +/- symbol.
Step 4: Add the file to VCS
To add the file, right click on the file icon with the blue question mark, then go to VCS->Add.
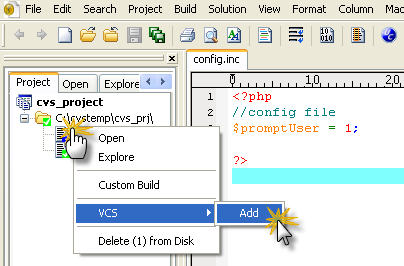
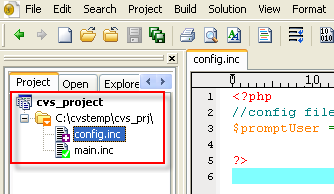
When the file has been added, you will see a file icon with a purple plus (+) symbol on it. You will also notice the orange down arrow which references that the module has been changed.
Step 5: Commit the file to VCS
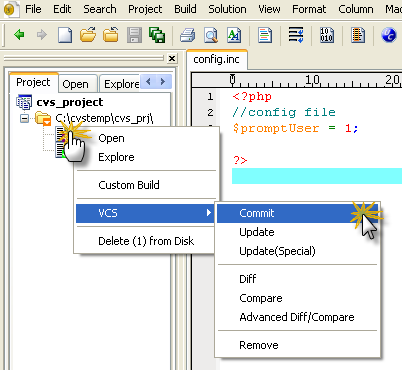
Now that the file has been added, it will need to be committed. To commit the file, simply right click on the file icon with the purple plus symbol, then go to VCS->Commit.
Now that the file has been added, it will need to be committed. To commit the file, simply right click on the file icon with the purple plus symbol, then go to VCS->Commit.
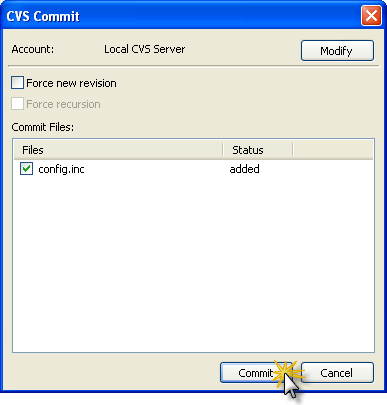
Next, you will be prompted with the “CVS Commit” dialog, make sure your file is selected (checked), then click on the Commit button.
Before the file is commited, you may be prompted to record notes in the log. You may type any pertinent information in the log and click save.
