IDM PowerTips
Column mode
One of UltraEdit’s most powerful features is its easy-to-use Column Mode. Column Mode allows you to select columns of data (as opposed to rows) by changing the way you can select text in the editor. With Column Mode, you can edit columns of data in just seconds!
When in column mode, sometimes referred to as “block mode”, UltraEdit will highlight text based on the column position of the first character you select to the column of the last character you select. Text selected in column mode does not automatically include all text between the start and end position, but does include all text in the columns between the first and last character you select.
When column mode is enabled, additional features in the column menu are enabled as well. In the next few paragraphs, we’ll take a look at some of those features.
Simple Editing in Column Mode
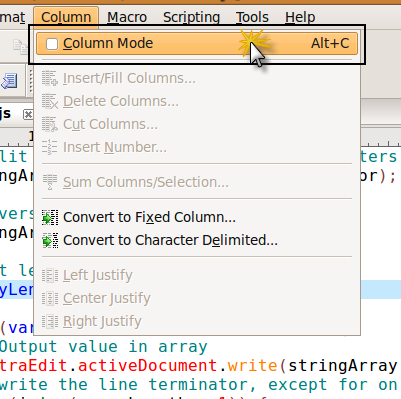
To enable Column Mode, press ALT + C, or select Column Mode from the Column menu.
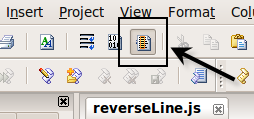
Now that you’ve activated column mode, you should see the column mode icon is “on” in the main toolbar.
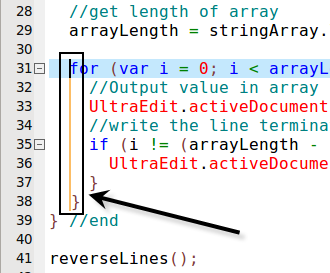
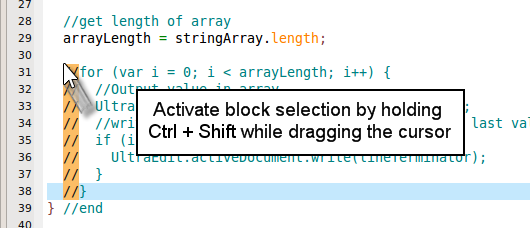
Column Mode is useful for many things; even simple file editing is faster with column mode. In the sample javascript below, we have a section of code that needs to be commented out of the file. Instead of manually typing in the javascript line comment string (“//”), you can hold the cursor in position on the first line of code, then drag the cursor downward to the last line that will be commented out.
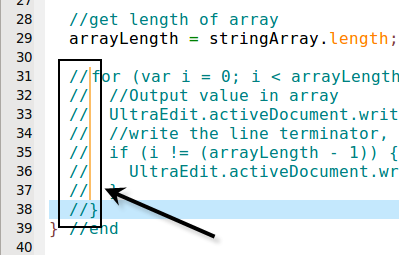
You may type your text after the cursor has been positioned correctly. In our case, we are typing the line comment – ie: //. As you can see, the entire block of code has been commented out of the document.
Keyboard Shortcut
Power users often want to avoid clicking on menus/toolbars, so we try to accommodate this as much as possible. Because column mode editing is an often-used feature, we added a keyboard shortcut to simplify the process. You can activate column mode editing by simply holding Ctrl + Shift while you click and drag your block selection.
Insert/Fill Columns
The “Insert/Fill Columns” command under the Column menu allows you to enter a text string into a specific column in your data. If a column is selected, the string will be inserted into every selected line.
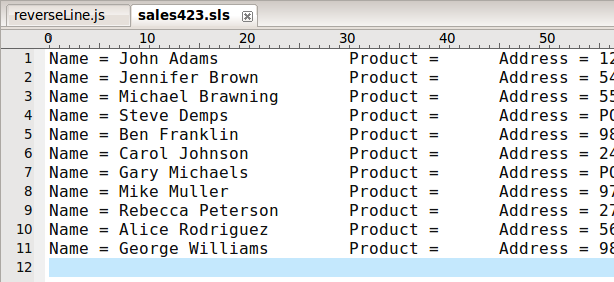
In the sample data below, the “Product” field is empty. This can be filled using the manual methods described above, but it would be much easier – and faster – with the “Insert/Fill Columns” command.
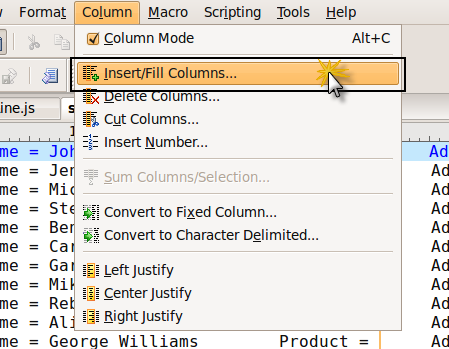
You are then prompted with a dialog box where you can input your string.
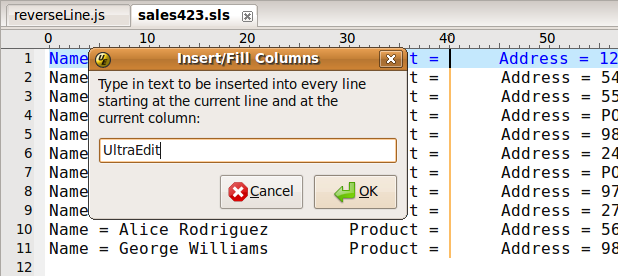
Type your text then press OK.
As shown in the screenshot above, UltraEdit inserts the string in the cursor-specific position on every line.
Insert Number
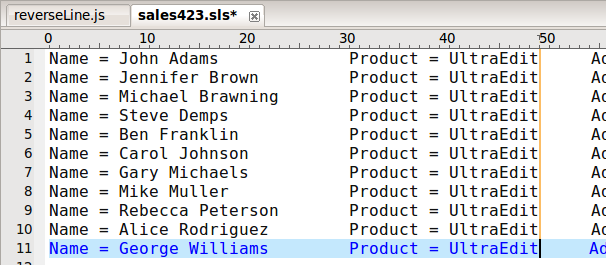
Another useful feature of Column Mode is the “Insert Number” feature. This is very helpful when you need to (numerically) order a list of data. You can use this feature by positioning your cursor into the top row of the column where you need to add numbers. You can then select the “Insert Number” command from the Column menu.
If any text is highlighted at the invocation of this command, the highlighted text will be replaced by the inserted line numbers. The spacing required for the line numbers is calculated automatically based on the number of lines that will have a number inserted, the initial value and the increment.
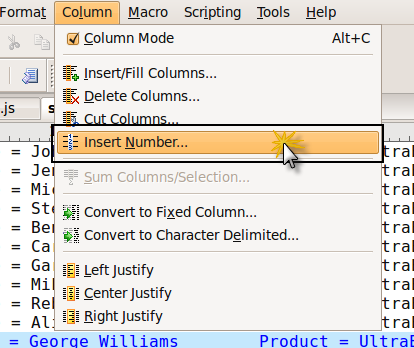
The ensuing dialog prompts you for the numbering options.
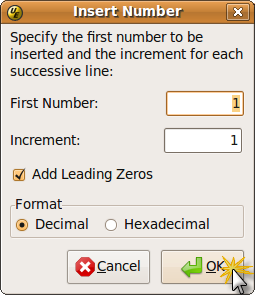
First Number: The digit(s) you enter here will be the first number of the number string that is inserted. So, if you entered “10” instead of “1”, the number sequence would begin “10, 11, 12…” etc.
Increment: The digit(s) you enter here determines the increment of the count. For instance, if you enter “2” here, while your “First Number” is still specified as “10”, the number sequence would begin “10, 12, 14…” etc.
Add Leading Zeros: This option, if selected, will prepend each number with the appropriate amount of zeros to pad the field to the same width (in characters) as the maximum number. For instance, if you begin a count with “1,” and set the increment to “50” with “Leading Zeros” checked, your list would begin “001, 051, 101…”
For this power tip, we will only number the rows in increments of 1, so we will leave the default options and press “OK”.
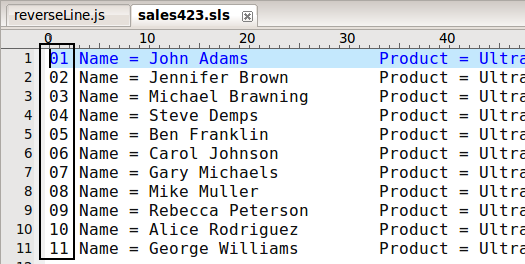
You now have a list of numbers on each line.
Sum Columns/Selection
One way to save time and avoid error when adding column-specific data is to use the “Sum Columns/Selection” command from the “Column” menu. In our sample data below, we have some random sales figures that need to be totaled. Using the “Sum Columns/Selection” command we can total all the numbers that appear in a selected area.
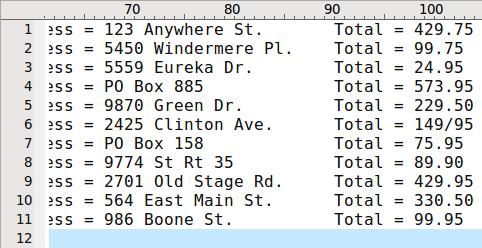
You will need to first make your selection, making sure to include ALL columns that include data to be summed. With your selection still active, select the “Sum Columns/Selection” command from the “Column” menu.
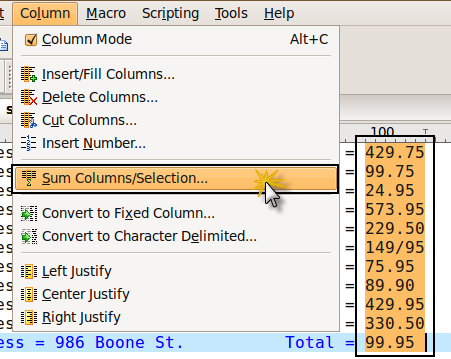
The sum is calculated and then displayed in the “Sum Selected Text” dialog box.
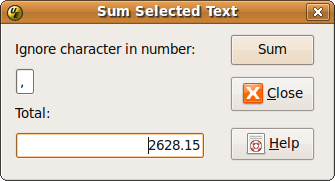
The “Ignore character in number” allows you to specify any character that should be ignored in a number. By default, this is set to a comma. This allows you to get the sum of a column of numbers where, for example, “1000” is written as “1,000”.
Other Column Menu features
There are several other commands under the “Column” menu which were not covered in the above tutorial.
Delete/Cut Columns
This command allows you to either delete or cut a specified number of columns from each row. Selecting this command will invoke a dialog that asks for a specified number of columns you would like to delete or cut. The delete or cut will begin at the current cursor position and will span the number of columns you specify. If you enter a value of 0, only the selected column will be deleted or cut.
Convert to Fixed Columns
This function allows you to convert a file from character delimited fields to fixed columns. This is particularly useful where column manipulation is required, but difficult because of different field widths for each row. This function allows you to specify separator characters and field widths. You are also given the option to “scan” the document for appropriate field widths.
Convert to Character Delimited
The opposite of “Convert to Fixed Columns,” this function allows you to convert a file from fixed field widths to character delimited fields.
Left/Center/Right Justify
These functions allow you to justify a selected column of data, with the boundaries of the selection acting as the margins. Left-justifying a column of data will justify the data against the left of your selection, while right-justifying will do the opposite. Center-justifying the column of data will center the data within the selection.

